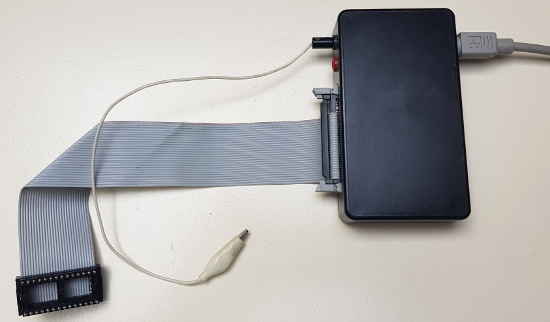
Tiny Eprom Simulator

Specifications
| Processor used: | Atmel AT89C2051 |
| Software version: | V1.0 |
| Year of development: | 2000 |
| Simulated EPROM size: | 32kb, equivalent to 27C256 |
| File format: | Intel Hex |
| Control: | Via SB-Bus and simple terminal program |
| SB-Bus Address: | Hard programmed to 134 ($86) |
| Power supply: | Borrowed from target system (5V @ approximately 30mA) |
Introduction
Program development for stand-alone micro processor systems can be done in many different ways. This project is intended for processors with external program memory. Modern processors with internal Flash memory will not benefit from this project and must be programmed in a totally different way.
Some of us prefer buying integrated development tools for a specific processor. They usually feature a processor emulation device, programming languages and software simulation tools. To my opinion this approach has three major disadvantages:
- IDE tools tend to be very expensive
- IDE tools usually only run on Windows
- Fixed to one processor type or processor family
You can also use a development system with a monitor program which takes care of downloading the program under construction. These systems usually feature some debugging functions like setting break points and single step program execution. Typical disadvantages of these systems are:
- Development is not transparent, the final program can not run without the monitor when finished
- The monitor program uses some system resources
- Also fixed to one processor type per monitor version
An other approach could be using one of the freely available software simulation programs to develop the software in a very early stage. I don't like this approach very much either. Again I can think of some disadvantages to this approach:
- Software simulation is not real-time and I/O is also simulated
- It takes some time to learn how the tools work
- A project can never be simulated for 100%
And then there is the trial and error technique. That's more like it! Main advantages of this technique are:
- Independent of processor type
- No special tools required, which makes it cheap and easy to learn
But there's also a main disadvantage to this approach: You'll have to program an EPROM for every try, then you'll have to swap this EPROM with the previous one in the target system. And if you have only a limited number of EPROMs available you'll have to spend quite some time erasing the used ones. This last disadvantage can be eliminated by using an EEPROM device during development for those devices don't have to be erased by exposing them to ultra violet light.
I have created many projects using this technique for many years until I developed an EPROM simulator. An EPROM simulator replaces the normal EPROM in the target system during development. The software is then simply downloaded from the host PC to the simulator and after the download the target program is immediately started. Once the program is finished it can be programmed into a normal EPROM without any changes, which then replaces the EPROM simulator in the target system.
The EPROM simulator that I've built back in 1994 can simulate many different EPROM sizes and has some other nifty features.
Unfortunately that device is a little difficult to copy because of the number of components which are used.
That's why I decided to build this Tiny EPROM simulator.
It can only simulate one EPROM size, namely 32kb.
This size of EPROM is widely available and is very suitable for most applications.
Until now I never needed more than 32kb for my projects, but that may be because I always program in assembly.
Like most of my projects the Tiny EPROM Simulator can be controlled by the SB-Bus.
Simply send the WRITE command, followed by the Intel HEX file to the COM port and the target processor is held in RESET until the upload is completed.
Then the RESET to the target processor is automatically released and the new program is started to be evaluated.
The SB-Assembler Version 2 can directly control the SB-Bus creating a seamless development system when combined with this Tiny EPROM Simulator.
Now it's only a matter of starting the assembler and the resulting code is sent to the target system at the same time.
Once the assembler is done the new program is instantly running!
