Little Tweaks
This page shows some little tweaks I usually make to the system to make it suitable for my own needs.
Even though I am an enthusiastic Linux user myself, I don't pretend to know everything about it.
Some of the tweaks on this page were found on other web sites.
I merely collect them here to have them all at hand whenever I need them.
This page was first written shortly after I have received my Raspberry Pi, when it was running Debian6 19-04-2012.
In the mean time the official Raspbian OS was released, which includes a utility called raspi-config, which adresses most of these tweaks in a neat configuration menu.
Most of the tweaks on this page can be done through this menu, but the manual tweaks still work.
Therefore I leave them here for reference purposes.
Table of content
Starting your Raspberry Pi for the first time
 You'll have to start your Pi with a keyboard and screen attached the first time, because ssh is not enabled per default making it impossible to access your Pi remotely.
The raspi-config utility is started automatically the first time (see image on the right), which gives you the opportunity to setup some of the system settings described below.
After entering all your preferences the system will reboot and your Raspberry Pi is ready for real use.
You can change the preferences at any time by entering sudo raspi-config into the terminal. Be warned though that some of the menu items take a while to load, especially the "keyboard" option may appear not to obey. Be patient though, it will open up, eventually.
Per default Raspbian will boot in GUI mode, which is nice if you want to use it as a desktop machine. However, in the raspi-config utility you can choose to boot into a text mode console only.
Install all security updates
For most Linux users this is a second nature. Especially if you intend to allow access from the internet it is of utmost importance that you install security updates on a regular basis. Updating is done by typing 3 commands on the command line:
sudo apt-get update
sudo apt-get upgrade
sudo apt-get clean
The Raspberry Pi is no race monster, therefore the update process might take quite some time the first time.
Tip for user of 2GB SD cards:
Normally, on a fresh installation, there's only about 14% of disk space left.
You will very likely run into memory problems when you run a long over due upgrade.
No worries though, simply run the command sudo apt-get clean and repeat the upgrade process.
The part which was done before the disk memory was full has already been done, so chances are that you will succeed this time.
After each upgrade a lot of large temporary files are left on the SD card.
Be sure to run sudo apt-get clean in order to reclaim that memory.
Running out of disk memory is not really a nice thing to allow to happen, especially if your Pi is performing an important job which may not be interrupted during the upgrade. In that case it's better to upgrade in small steps, if you fear of running out of memory. For this to succeed you must perform this operation several times, until the system is completely up to date. Start the upgrade like you normally would.
sudo apt-get update
sudo apt-get upgrade
The last command asks you for permission to continue. Refuse this by typing an N if it says it wants to fetch too many MBs to fit in your free disk space. Now look at the list of packages the system wants to upgrade. Select a bunch (go for it line by line, or maybe a couple of lines at the time), copy them. Then paste the selected packages behind the following command.
sudo apt-get install <<paste here>>
sudo apt-get clean
Repeat this process until all packages are up to date again.
Change login name and password
A new installation of Raspbian comes with the login name pi and password raspbian. We all know that we have to change the password if we intend to make the Raspberry Pi accessible from the evil internet. Changing the password can easily be done with the sudo raspi-config utility, or with the standard passwd command.
Changing the login name is a bit more complicated though. No worries with the little script below you can change the login name to your liking. The script will change the login name, the user's home directory and main group name for you.
#! /bin/bash

# Parameters
# $1 = old login name
# $2 = new login name

# Change login name
/usr/sbin/usermod -l "$2" "$1"

# Change user's home directory
/bin/mv "/home/$1" "/home/$2"
/usr/sbin/usermod -d "/home/$2" "$2"

# Change user's initial group name
/usr/sbin/groupmod -n "$2" "$1"
Before you can copy the script above to your Pi you'll have to become root by typing sudo su. Then go to root's home directory by typing cd. Finally use your favourite text editor to enter the script (or copy/paste it) to a file named changelogin. Once you have saved the script, make it executable by typing chmod u+x changelogin.
Executing the script requires some attention.
You can't simply run the scipt, not even as root, because the user you are about to change is still loged in and owns some of the running processes.
Probably there are many ways to solve this, but I've choosen the solution of using cron to execute the script.
Type crontab -e and add the line below at the bottom of root's cron table.
Replace [min] [hour] to a few minutes ahead of the current time.
Be sure your time zone is set properly already, or use the date command to see what time your Pi thinks it is.
Also change [old-login] by the old login name (pi in most cases) and [new-login] to whatever you want the login to be.
[min] [hour] * * * /root/changelogin [old-login] [new-login]
Then logout from your Pi completely, the old login should no longer be active for this to succeed.
Now wait until the time has passed which you have set up in your crontab.
When you've done everything right, you can then login to your Pi using the new login name and your home directory has been renamed from pi to your new login name.
The only thing left to be done is to remove the crontab line you have entered (as root), otherwise your Pi will try to change your login name again tomorrow.
Be careful with this sript! The script is really stupid, it contains absolutely no error handling. Any silly input may be rewarded with a silly action, which in the worst case may lock you out of your Pi forever. Not to worry though, if you do this on a virgin installation you can easily re-install Raspbian again.
There's one more thing to make the change complete. Edit the file /etc/sudoers and change or delete the following line.
pi ALL=(ALL) NOPASSWD: ALL
Change pi into your new login name if you want to be able to become su without entering your password. Delete the line completely (or comment it out by placing a # in front of the line) if you insist on entering a password before you become su.
Update
As of version 2016-11-25 of Raspbian the sudoers setup has slightly changed.
Now all individual sudo user settings are stored in the /etc/sudoers.d directory.
If you still want to be able to become a sudoer without a password you'll have to change both the file name 010_pi-nopasswd and the contents of that file to reflect your new user name.
And if you want to insist on a password to be given you can rename the file into 010_user-nopasswd.disabled.
This works because having a dot in the filename excludes the file from being processed.
You could also simply delete the file of course.
Update
After a system update in December 2016 I started getting security mails from my Raspberry Pis, at each login, with this content:
stuart : Dec 5 09:12:08 : user : a password is required ; TTY=pts/1 ; PWD=/home/user ; USER=root ; COMMAND=/bin/grep -E ^pi:
It appears that the good people who maintain Raspbian have added a script which checks whether sshd is enabled, while the password of the default user pi has not been changed.
This script uses a sudo command, and because we have just setup our system to demand a password whenever we want to use the sudo command, we get this error message now.
This is simply solved by removing this script by typing the following command:
sudo rm /etc/profile.d/sshpasswd.sh
Now let's hope Raspbian will not add this script again after the next upgrade.
Enabling sshd
Eanabling sshd can now be done with the raspi-config utility in Raspbian.
So if you are running Rasbian type sudo raspi-config and choose the "ssh" option.
Be sure to read the rest of this tweak too, because the security related tweaks are not automated by the raspi-config utility!
If you still run the first Raspberry releases of Debian you can enable sshd as described below.
This will no longer work this way in Raspbian.
While using the Raspberry Pi as a controller it is mandatory that you can control it from a distance. Therefore you should enable the ssh deamon. This is easily done by renaming a file by typing:
sudo mv /boot/boot_enable_ssh.rc to /boot/boot.rc
The ssh deamon will automatically be started at the next reboot. If you want to run it now, without restarting the Pi, type:
sudo /boot/boot.rc
Security is very important, especially if you intend to make your Pi accessible from the internet.
Therefore I recommend you to regenerate the default public and private keys of the system.
Normally the keys are embedded in the ISO you have just installed, wich means that they are the same on all systems.
Recalculating the keys is only a matter of entering the next commands:
sudo rm /etc/ssh/ssh_host_* && sudo dpkg-reconfigure openssh-server
I recommend you to do this before you connect to the Raspberry Pi from an other computer for the first time. Otherwise you will have to discard the old public key on the remote computer, because it has become invalid after recreating them on the Pi.
And while we are talking about security, use the command below and look for the line which says: PermitRootLogin yes and change the yes into a no. This will disallow the user root to login from the network (including the internet).
sudo nano /etc/ssh/sshd_config
Set the keyboard layout to your liking
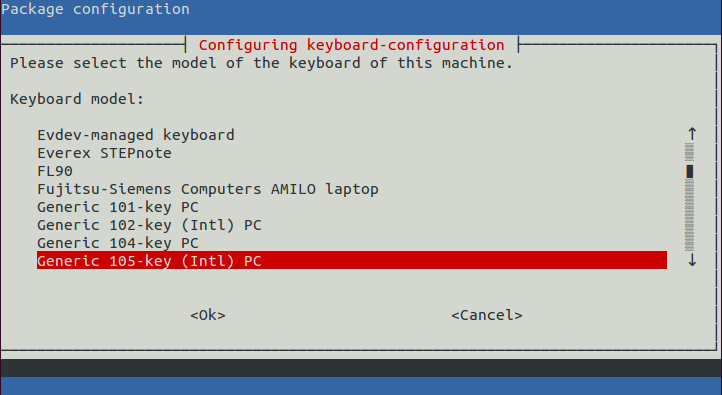
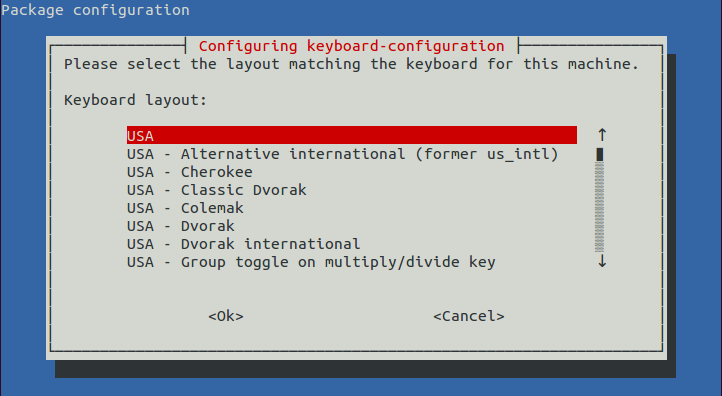
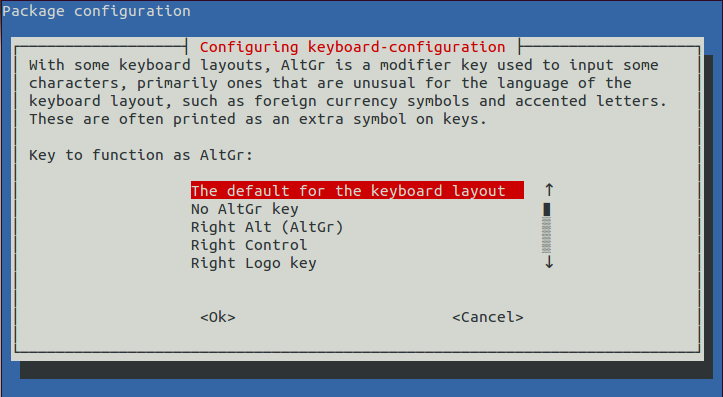
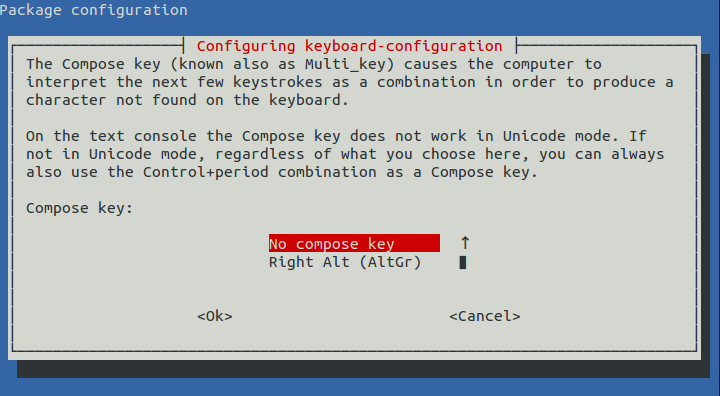
This can now be set using the raspi-config utility. It may take quite a while for the keyboard setup utility to start, so be patient when you select it. The rest of the keyboard setup process is as described below.
Per default the keyboard layout is set to GB. You can simply change it to your own layout by typing:
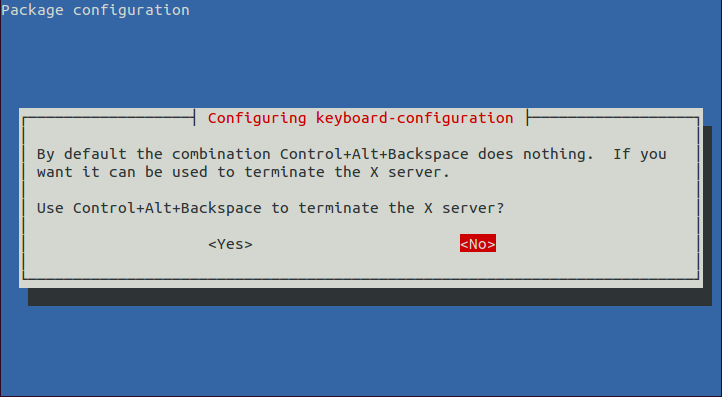
sudo dpkg-reconfigure keyboard-configuration
You can click any of the screen shots below to enlarge them. These screen shots were taken from all the menus in the above command generates in sequence.
Change Time Zone
This can now be set using the raspi-config utility. It may take quite a while for the time zone setup utility to start, so be patient when you select it. The rest of the time zone setup process is as described below.
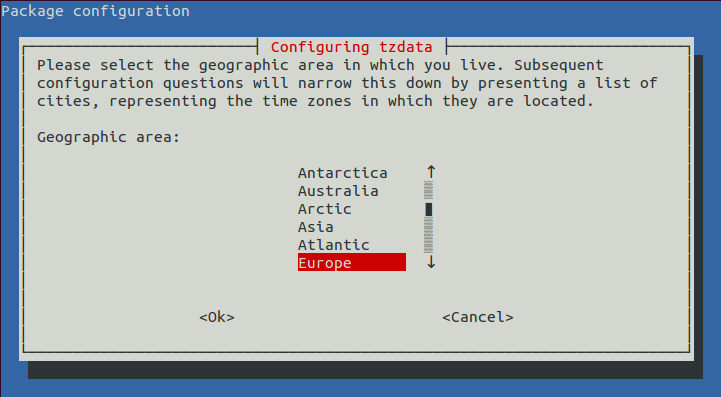
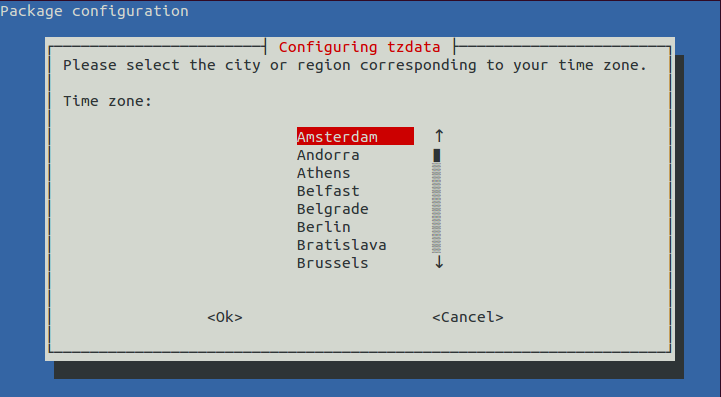
Also the time zone is set to the UK. The next command will simply change it to yours:
sudo dpkg-reconfigure tzdata
Be prepared, it is a very long list! Marking and unmarking the the selected locales is done by pressing the space bar.
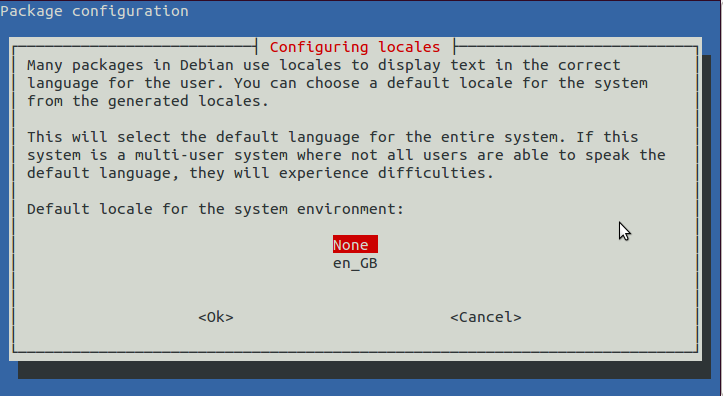
Change locales
This can now be set using the raspi-config utility. The rest of the locales setup process is as described below.
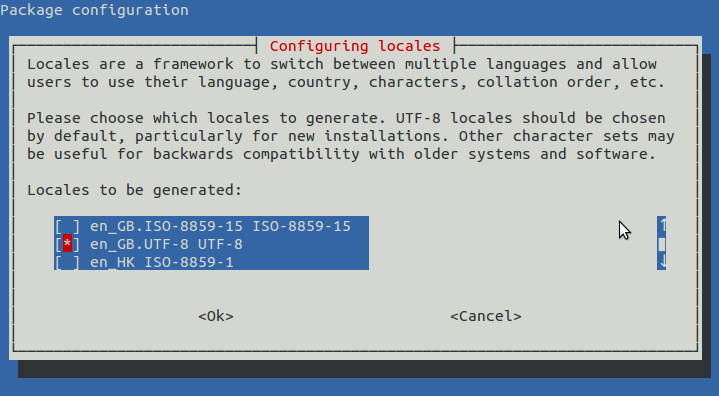
And to make the personalization complete you can change the locales to your region with this command:
sudo dpkg-reconfigure locales
Disabling sleep mode
I hate it when systems fall asleep on me when I blink my eyes.
The fact that I don't touch any keys doesn't necessarily mean that I'm not using my system.
I might be keeping an eye on log data, or running a slide show or something.
Above all, screen savers are quite useless on LCD screens anyway.
Disabling the screen saver wasn't as straight forward as one might expect.
Apparently there are a few different modes of operation which all take a slightly different solution.
Adding 1 + 1 from the things I've found on the internet sums up to the following solutions, which work for me.
Disabling the screen saver in Text mode
Disabling the screen saver for the text mode terminal is very easy.
It is only a matter of changing one line in the file called /etc/kbd/config.
Change the line BLANK_TIME=30 into BLANK_TIME=0.
Then reboot.
Or you can reload the kbd deamon by typing sudo /etc/init.d/kbd restart.
This used to be enough. However I've discovered that despite of all this the screen still blanks after 15 minutes of keyboard idle time. To fix this, hopefully once and for all you'll, have to type sudo nano /etc/rc.local and add the following line, just before the line containing exit 0.
setterm -blank 0 -powerdown 0 -powersave off
Disabling the screen saver in the GUI
Only way I've been able to fix this issue is install xscreensaver.
To install you need sudo apt-get install xscreensaver .
In the gui you will now have the screensaver option under preferences.
Here you can disable the blank screen. Let me know if this makes sense and helps!
Access disk space around the world with sshfs
You could access disk space on other computers using Samba (Windows file sharing system) or nfs.
However both methods are restricted to machines on the local network.
As an alternative you could use ftp, but that is very out dated and rather insecure.
My choice is to use sshfs, which connects to the remote computer over ssh, which is secure even when connected over the evil internet.
To install sshfs type the two commands below:
sudo apt-get install sshfs
sudo usermod pi -a -G fuse    # you may need to replace pi with your login name!
These commands install sshfs for you and add user pi to the group fuse. You'll have to log out and log back in to make the new group effective.
Now you can connect to the file system on any ssh enabled computer (usually another Linux or Unix machine). First create an empty directory on the Pi which will be used as mount point, if it doesn't already exist. Then type a line which looks like the one below:
sshfs user@remotemachine:/home/user storage
Naturally you'll have to replace most of the parameters in the line above.
User is the user name on the remote computer you want to connect to.
Remotemachine is the IP address or domain name of the remote machine.
So far it is just as if you were to connect to the remote machine over ssh.
The first difference is the collon wich directly follows the remotemachine's address.
This colon may be followed by the path on the remote machine which you want to connect to.
You may leave this empty, which will connect to the home directory of the remote user.
The last parameter is the mount point, which in our case is the empty directory you have created on the Raspberry Pi.
After entering the remote user's password you can access the remote file system from within the directory storage in our example.
Now your Pi can have virtually limitless storage capacity, without adding one single component.
Disconnecting the mount point can be done with the command below.
fusermount -u storage
