Before I Got My HP-34C

There's always something to be calculated in any lab.
Whether it is something simple as converting measured period times to frequency, or the voltage of a voltage divider, or the more complicated things like filter components.
Nowadays you'll find many online calculators for any specific engineering computation.
Or you can use a spreadsheet to perform repetitive calculations.
Most of the equipment in my vintage lab pre-dates 1980, thus the internet was not there yet and Visicalc was just about to be invented.
Fortunately electronic calculators were quite common in the seventies and eighties, so I didn't have to get all the way back to the slide rule, although I have been taught how to use one at school.
And I still own some.
Before 1980 I have worked my way through 3 increasingly sophisticated Texas Instruments calculators. In my first year of my engineering education I bought myself an SR-40, a simple scientific calculator. I have no idea where it went when I bought my first programmable calculator, the TI-57. Nor do I know where the TI-57 went when I bought my last Texas Instruments calculator, the more sophisticated TI-58.
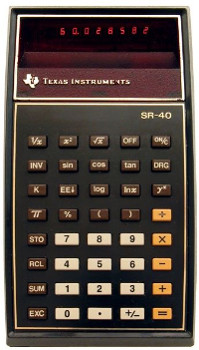 Texas Instruments SR-40
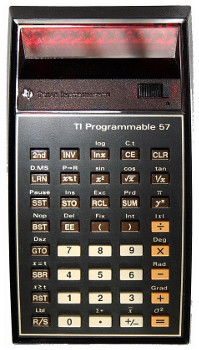 Texas Instruments TI-57
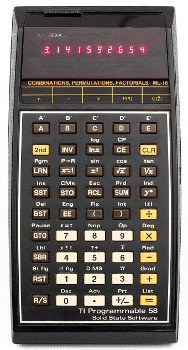 Texas Instruments TI-58
I was well aware of the calculator wars which were waged in the late seventies.
These wars were between the algebraic calculators (mainly Texas Instruments and Casio) on one side, and the RPN calculators from HP on the other side.
At the time I was clearly on the algebraic side.
During my first internship our department manager had a very expensive HP calculator, not that he knew how to make any calculation with it.
Come to think about it, I have no idea what the man used to do during his daily work.
Anyway, his HP calculator was off limits to everybody, therefore I have no recollection of what model it was.
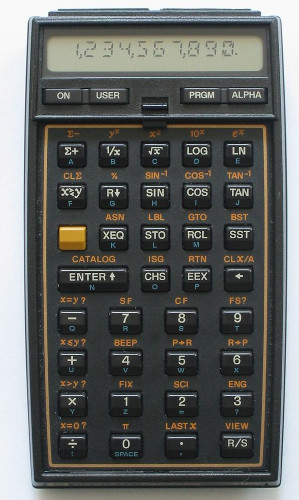
During my second internship at Fluke, in 1980, I saw the light and I've bought my first HP calculator, the HP-41C no less. It is still alive today! My decision was helped because I was in need of a new calculator, because my TI-58 developed a problem. It took the machine about 5 minutes before it started to work properly. Until it did a 0 simply blinked very nervously in the display.
I really loved my HP-41C, especially when one of my classmates wanted to borrow it from me.
Classmate: "Can I borrow your calculator?"
Me: "Sure you can."
Classmate: "How do I clear the display?"
Me: "You don't have to."
Classmate: "Where's the equals key?"
Me: "You don't need one."
And then I always got my calculator back.
However, there's only one thing wrong with the HP-41C. It didn't exist yet when most of my vintage equipment came on the market. I really needed an HP calculator with an LED display, which better fits that era.
My HP-34C
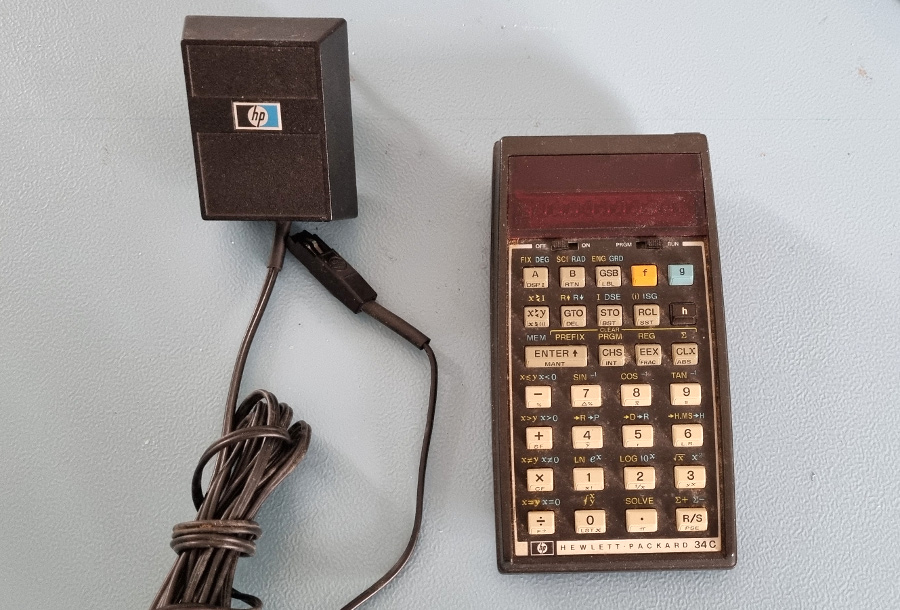
I've searched long for a suitable calculator, although I was not particularly fussy about the model I wanted.
I did make some biddings on some, but I was always outbid by someone who was prepared to pay more for an old HP calculator than I would be willing to spend.
Until March 2022, when I got lucky.
I was right in the middle of making preparations for our new kitchen and I had very little time to spend on my lab, when I found an HP-34C, which was sold as not working.
Fortunately I was the only one to bid on it, so I won the bid and got it for less than €50, including shipment.
It took me an entire week before I finally had time to open the package and look at what I've got.
The machine was a bit dirty, but otherwise in fairly good shape.
Opening up the battery compartment revealed, much to my relief, some very leaky batteries, which probably hadn't been removed by the previous owner.
They were wedged in pretty solid.
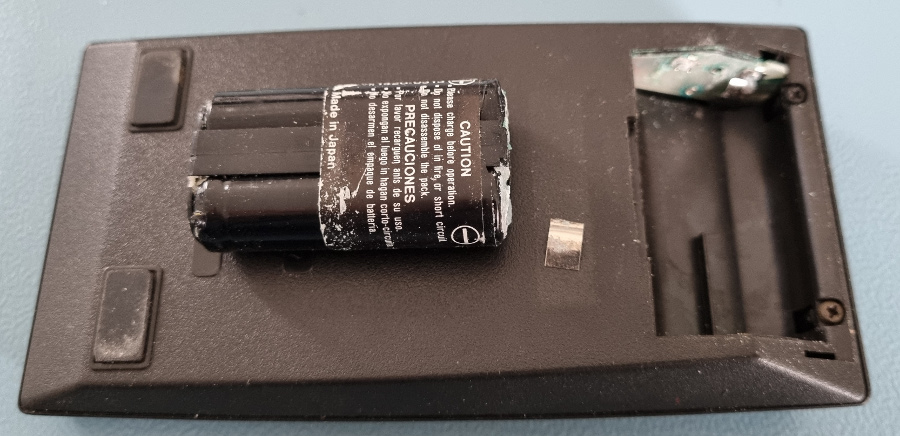
How can this be good news you might think? Well, it proves that no one has "attempted" to make any repairs for me and possibly made things worse. Anyway, with some mechanical persuasion I managed to get the leaky batteries out and saw that the battery connector was corroded as well, and the positive battery lip was broken off. That is all fixable.
I've opened up the device by removing 2 screws which are located at the top behind the battery cover. And then I was able to carefully pry the back from the calculator. This is a scary thing to do, I can tell you, and I'm not going to do it again unless it's absolutely necessary. It takes quite a bit of force to get the two halves apart, and plastic of more than 40 years old can easily break off. But fortunately everything went well this time.
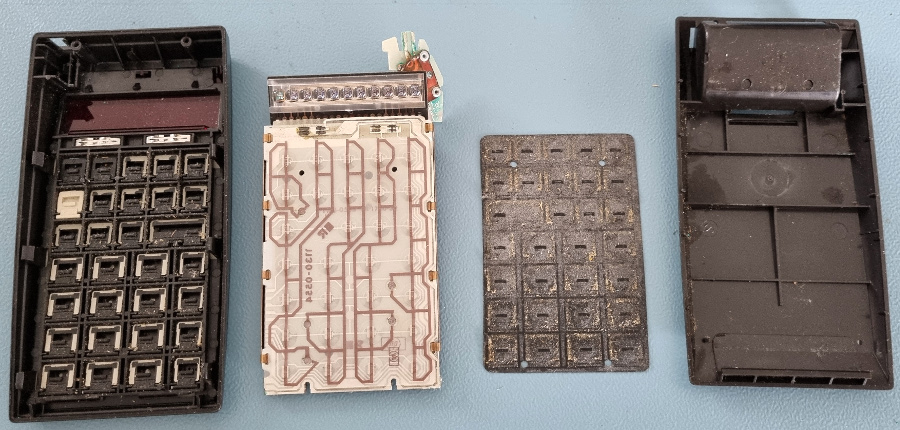 It takes many years to collect this much dust (click to enlarge)
Hats off for the engineers at HP for the great build quality for this great little calculator.
Normally a calculator consists of mostly air.
Not here, there's hardly any space left, almost the entire case is filled with a bracket which holds the keyboard, the PCB and the components.
Curious as I am, I had to take the thing further apart and see what the PCB looked like.
The PCB/keyboard was very easy to remove by bending away 6 plastic clips.
Ah, that revealed quite some dust and grime, which is easy to remove when all the keys are out.
There are plenty of pictures on the internet telling me in what order to put the keys back in.

And then I courageously removed the side clips from the PCB and the 3 little 8 pin DIP ICs came tumbling down onto my desk. DAMN, the ICs are not soldered! They are simply press fit to the PCB by the plastic bracket. In what order and what orientation do I put them back?
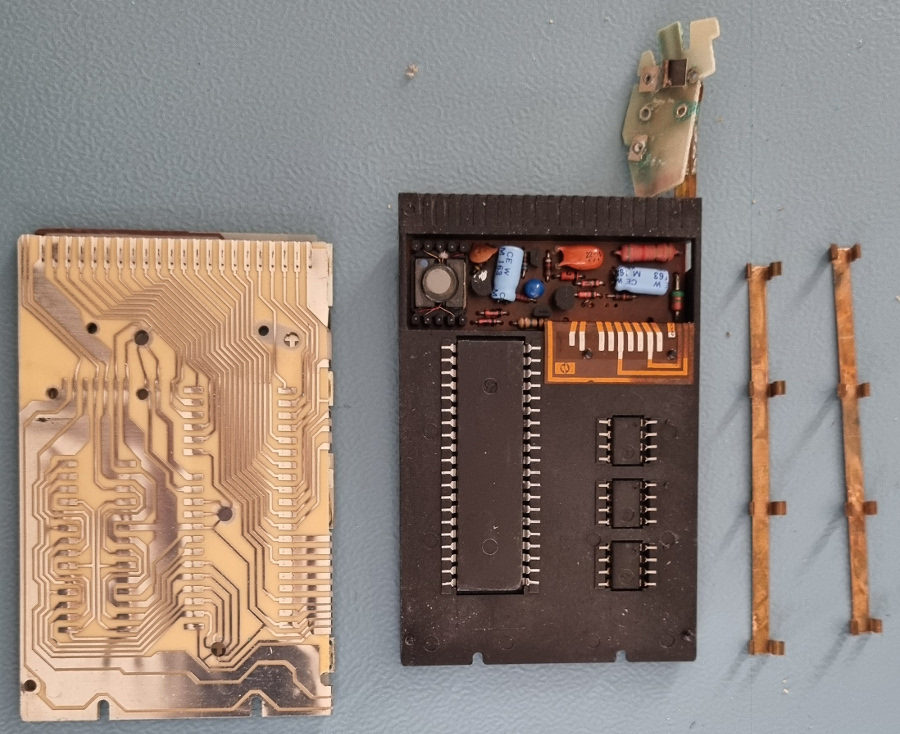
I hadn't made a picture of it yet and the internet showed various configurations, none of which matched what I had. Or if the configuration did match, the picture quality was too bad to read the part numbers. Anyway, with some guessing and a bit of luck I managed to get the ICs back in the right places and in the right orientation. PFFF, that was a close call.
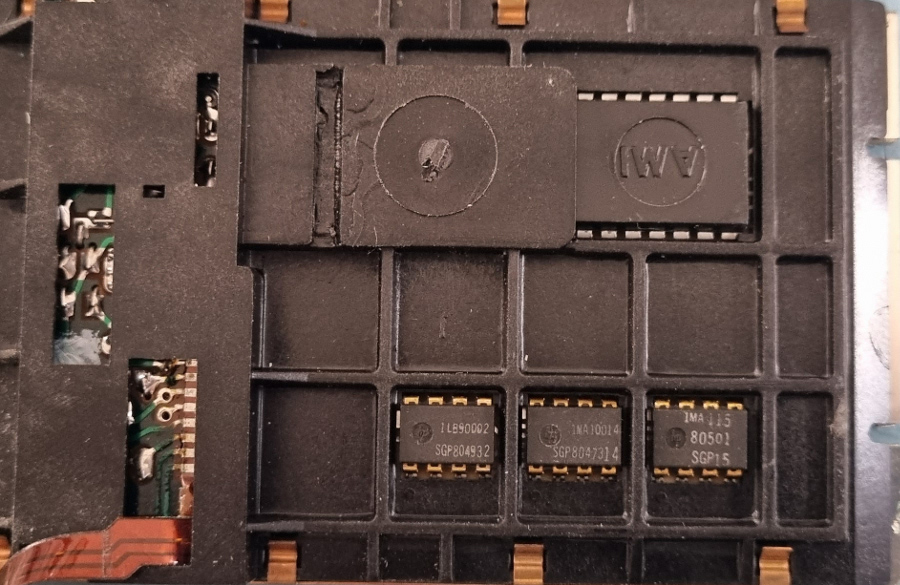

The on/off and program/run key pads looked rather dirty, so I've cleaned them too. And after cleaning the front bezel and the key caps I've partially put the calculator back together again. Then I've applied 2.5V to it for the very first time. And luckily everything seemed to be working. Fortunately the corrosion was limited to the battery connector board only, so there was hope that I could restore the calculator completely. I have seen pictures on the internet where the corrosion had spread to the inside of the display, and then you would be screwed.
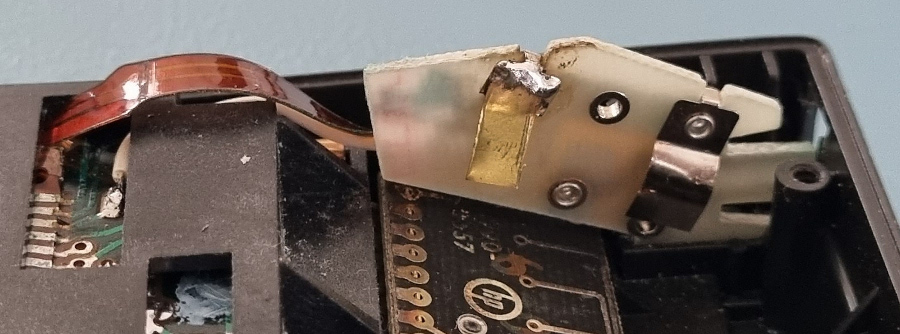
I've cleaned the battery connector PCB by placing it in a bowl of vinegar for about an hour.
After that it was very easy to clean it completely.
Fortunately the traces on the PCB were completely intact.
I've seen pictures on the internet where the traces for the charge connector were rubbed loose from the PCB.
That would have made things problematic if that would have happened.
But fortunately my PCB was totally unharmed.
Which leaves us with the broken battery lip.
That is simply replaced by a small piece of brass foil, soldered to the rivit which originally connected the battery lip to the PCB.
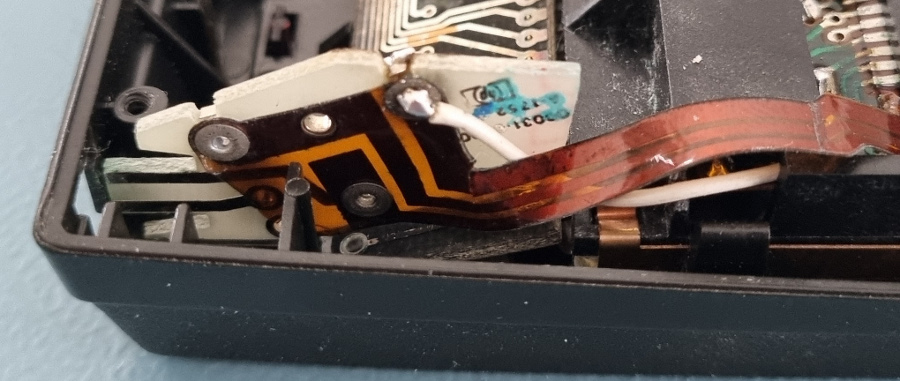
And then I broke it.
The flex PCB which connects the battery connector PCB to the calculator PCB is so brittle while the battery connector PCB itself is relatively heavy, it is almost inevitable to crack it.
I was so careful with it, but in the end one trace on the flex PCB was broken anyway.
It was the positive line coming from the battery.
Luckily this was easy to fix with a piece of wire.
And now the batteries.
The battery holder is a simple piece of plastic, which holds the two batteries together.
A small piece of thin shrink tubing holds the batteries together.
The old batteries can easily be removed by cutting this shrink tube.
And then I can put two new batteries inside this battery holder, and secure them with a small piece of electrical tape.
FAIL: The original batteries don't have a nipple on the positive terminal.
This makes my new batteries slightly longer than the original ones.
I've tried to modify the battery holder a litte, so that the nipple could be placed over the holder, instead of being trapped within it.
But that still didn't work, the entire thing was simply too long.
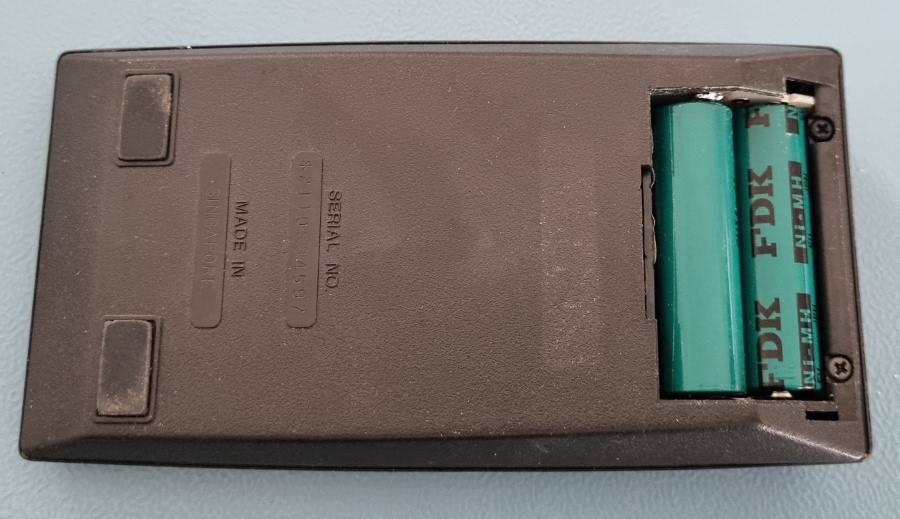
Then I decided I could do without the battery holder.
I simply soldered two batteries together on one side, placing them in series, making sure that the wire was placed next to the positive nipple.
Soldering the wire on top of the nipple would have made the battery too long again.
After that I could squeeze the battery pack in the compartment with relative ease.
Come to think of it, I also could have placed a small piece of brass foil at the other end of the batteries to join them together, instead of soldering them together.
The only downside of this approach is that I can now put the batteries in with reversed polarity.
Normally the battery holding bracket would have prevented that.
But I'm not the average user, so I'm aware that I should not reverse the batteries, so I'm fine with this solution.
The battery lid can slide over the batteries, making the calculator look like a new one.

And this is the final result. The calculator is performing perfectly, on a fresh set of rechargeable batteries. A few scuff marks show that it is an old machine, but I'm quite satisfied with the end result. And the price I had to pay for it was also quite reasonable for this piece of vintage kit.
HP-34C Programming
I've started making a collection of programs and program snippets for the HP-34C.
It is not my intention to create a vast library of programs, it will come down to just a few ideas which might be useful later on.
You can use the navigation keys on the top, or simply click here.
